





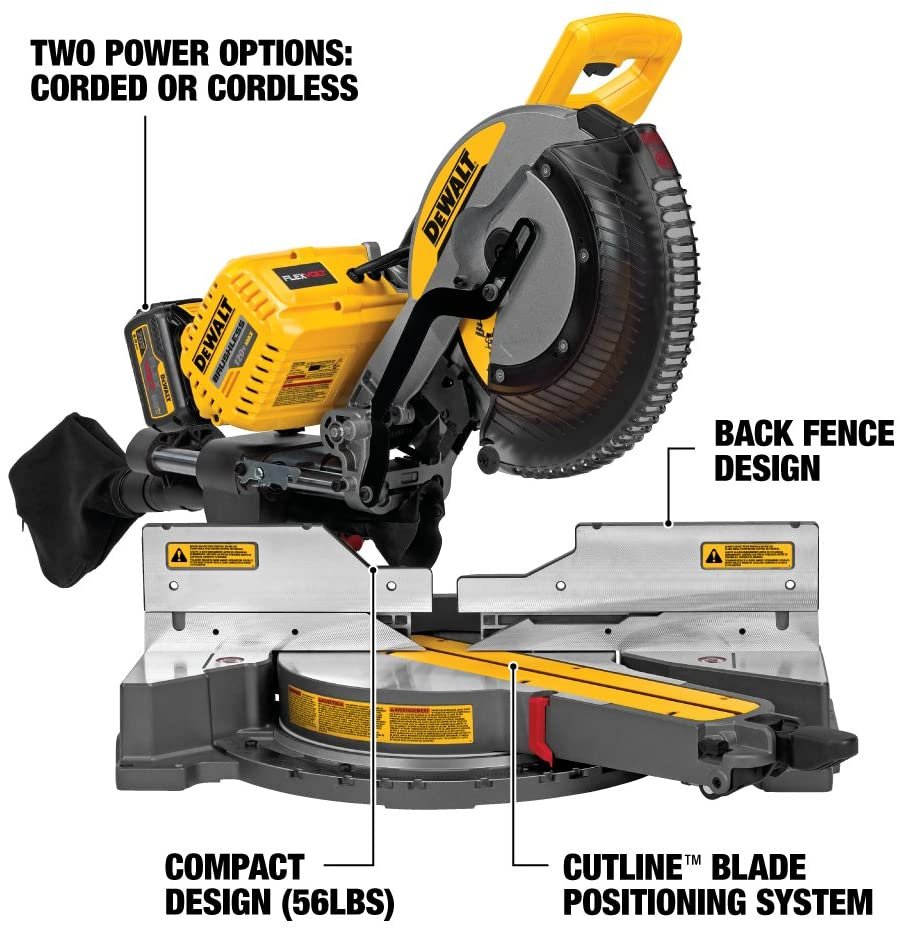
A cordless miter saw removes the cord but not the setup. The first cut on a new saw, and the first cut on any new piece of trim, still has to be checked against the same five things: the blade, the fence, the detent, the support and the battery. Getting them right takes about ten minutes and saves a trip to the store.

Start with the blade
Check the blade is the right tooth count for the material and that it is sharp. A sixty tooth blade leaves a cut that needs no sanding on trim; a twenty four tooth framing blade will tear out the back of a fine moulding. Fit the blade with the teeth pointing down toward the table, tighten the arbor bolt firmly, and spin it by hand to confirm it clears the kerf plate.
Check the fence for square
Lay a machinist square against the fence and the blade, with the blade locked down. Any light gap tells you the fence has drifted. Most saws allow the fence to be adjusted with two bolts; if yours does not, and the gap is visible, the saw will cut a consistent angle error on every piece, which is worse than a random one because it will not show up until you assemble.
Verify the detents
Set the saw to zero degrees and lock it, then check against the square again. Packed sawdust in the detent plate is the most common reason a saw stops seating at the angle you selected, especially at 45 degrees where the plate has a recess. Blow it out, then re-check. If you cut a lot of crown, mark the detents you use most often with a paint pen so you are not squinting at the scale.
Support the stock at both ends
Long stock that sags at the ends will bind the blade on the way down. Support both ends at the same height as the saw bed, using roller stands or a pair of sawhorses with a straight edge across them. Check the support height with a straightedge laid across the bed and the stand; a five millimetre difference is enough to pinch the blade and leave a burn mark.
When cutting crown in position, a crown stop jig holds the moulding at the correct spring angle. It costs less than a replacement piece of moulding and turns a two person job into a one person job. Mark the jig for the angles you cut most often so you are not re-measuring every time.
Battery capacity in real cuts
A five amp hour pack at eighteen volts holds about ninety watt hours. A cordless miter saw draws six hundred to a thousand watts under load, so a full pack is roughly five to nine minutes of actual cutting. That sounds alarming until you remember most cuts take two seconds; the number that matters is how many starts, because the saw draws its peak every time you pull the trigger and the motor spools up.
Softwood trim is light work and you will get dozens of cuts per pack. Hardwood, pressure treated lumber and engineered material such as composite decking are heavier and the pack drains noticeably faster. In freezing weather the same pack gives up twenty to thirty percent of its capacity, which is the most common reason a saw seems to lose power on a winter job. Carry a second pack and keep it warm inside your jacket rather than on the tailgate.
Kerf, blade thickness and finish
Standard blades cut a kerf around three millimetres wide. Thin kerf blades remove less material and cut faster on a battery saw, but they deflect more in tall stock, so the cut drifts. For baseboard and crown, thin kerf is an advantage. For anything taller than the blade depth, a standard kerf blade with a stiff plate holds a straighter line.
Whatever blade you fit, measure to the kerf rather than to the pencil line. Every piece comes out long if you measure to the mark on the waste-side of the line, and the error compounds with each successive piece. Cut one test piece, check it against the opening, then cut the rest to the confirmed length.
Common mistakes
- Cutting to the pencil line instead of to the kerf, which leaves every piece long
- Forgetting to account for the blade width when measuring a short return
- Letting the head rise before the blade stops, which nicks the workpiece
- Cutting on a bench that flexes, which changes the angle mid-cut
- Using a dull blade and blaming the saw for a wandering cut
- Leaving the battery in a cold vehicle, which cuts usable capacity by a third
Each of these costs a piece of trim. On a finished room that is a trip to the store, so the two minutes spent checking the setup before the first cut is the cheapest part of the job.
Maintenance that keeps the cut accurate
Blow dust out of the detent plate every few cuts, because packed sawdust stops the head seating at the angle you selected. Check the fence for square against the blade monthly with a machinist square, and adjust the fence bolts if it has drifted. Wax the table so stock slides without loading the blade, and never lubricate the blade itself.
Store the battery at room temperature and charge it before it is completely flat. A pack left discharged for months loses capacity permanently, which is why a saw that sat in a cold garage all winter feels weaker than it did in autumn. None of this is difficult, and all of it extends the working life of the tool.
If you want the full safety sequence for the saw in your own shop, including how to check the guard return and where to stand when the stock is short, this walkthrough of using a cordless miter saw step by step covers it in order.
Bottom line
Check the blade, square the fence, clear the detents, support both ends, and plan the battery. Ten minutes before the first cut is the difference between trim that closes cleanly and a second trip for the piece you cut short.