





A router is unforgiving in a specific way: it will happily cut exactly what you set up, including the mistakes. Most of the tearout, burning and wandering cuts people blame on the tool come from five minutes of setup that did not happen. This is the sequence worth running every time, whether you are cutting a roundover or a set of dadoes.
1. Unplug the tool
Every bit change, every depth adjustment, every time. Routers spin at twenty thousand revolutions per minute and a bump on the switch is enough. This is the step people skip when they are in a hurry, which is exactly when it matters.
2. Seat the bit properly
Insert the bit until the shank is fully in the collet, then pull it out about two millimeters so the collet grips the shank rather than the bottom of the bit. Tighten with the wrench, not by hand. A bit that creeps during a cut ruins the workpiece and can wreck the collet.
3. Set the depth from the workpiece
Use the actual piece, not a measurement. Bring the bit down until it just touches the surface, lock the depth stop, then set the cut depth. For a first pass, take no more than the bit diameter; deeper cuts load the motor and burn the edge. Two shallow passes are faster than one burned one.
4. Choose the right speed
- Small bits under 1 inch: high speed, near maximum
- 1 to 2 inch bits: two thirds of maximum
- Large panel and raised panel bits: half speed or lower
Too fast burns and dulls; too slow leaves a rough cut and hammers the edge. If the bit smokes, slow down.
5. Establish a reference edge
Freehand routing is a technique for rough work. For anything that shows, clamp a straightedge and run the router base against it, or use a bearing-guided bit against a template. The base must stay flat and in contact; the moment it tips, the bit digs in.
6. Mind the direction
Feed the router against the rotation of the bit. On an outside edge that means right to left along the fence. Feeding with the rotation is a climb cut, which pulls the tool into the work and produces a runaway cut in most hands. Climb cutting has legitimate uses in veneer and in specific template situations, but not as a default.
7. Control the dust
Routing produces a surprising volume of fine dust, and fine dust is the fraction that stays airborne. Connect a shop vac to the dust port, or at minimum wear a respirator and open the shop. This is a health step, not a tidiness one.
8. Test on scrap
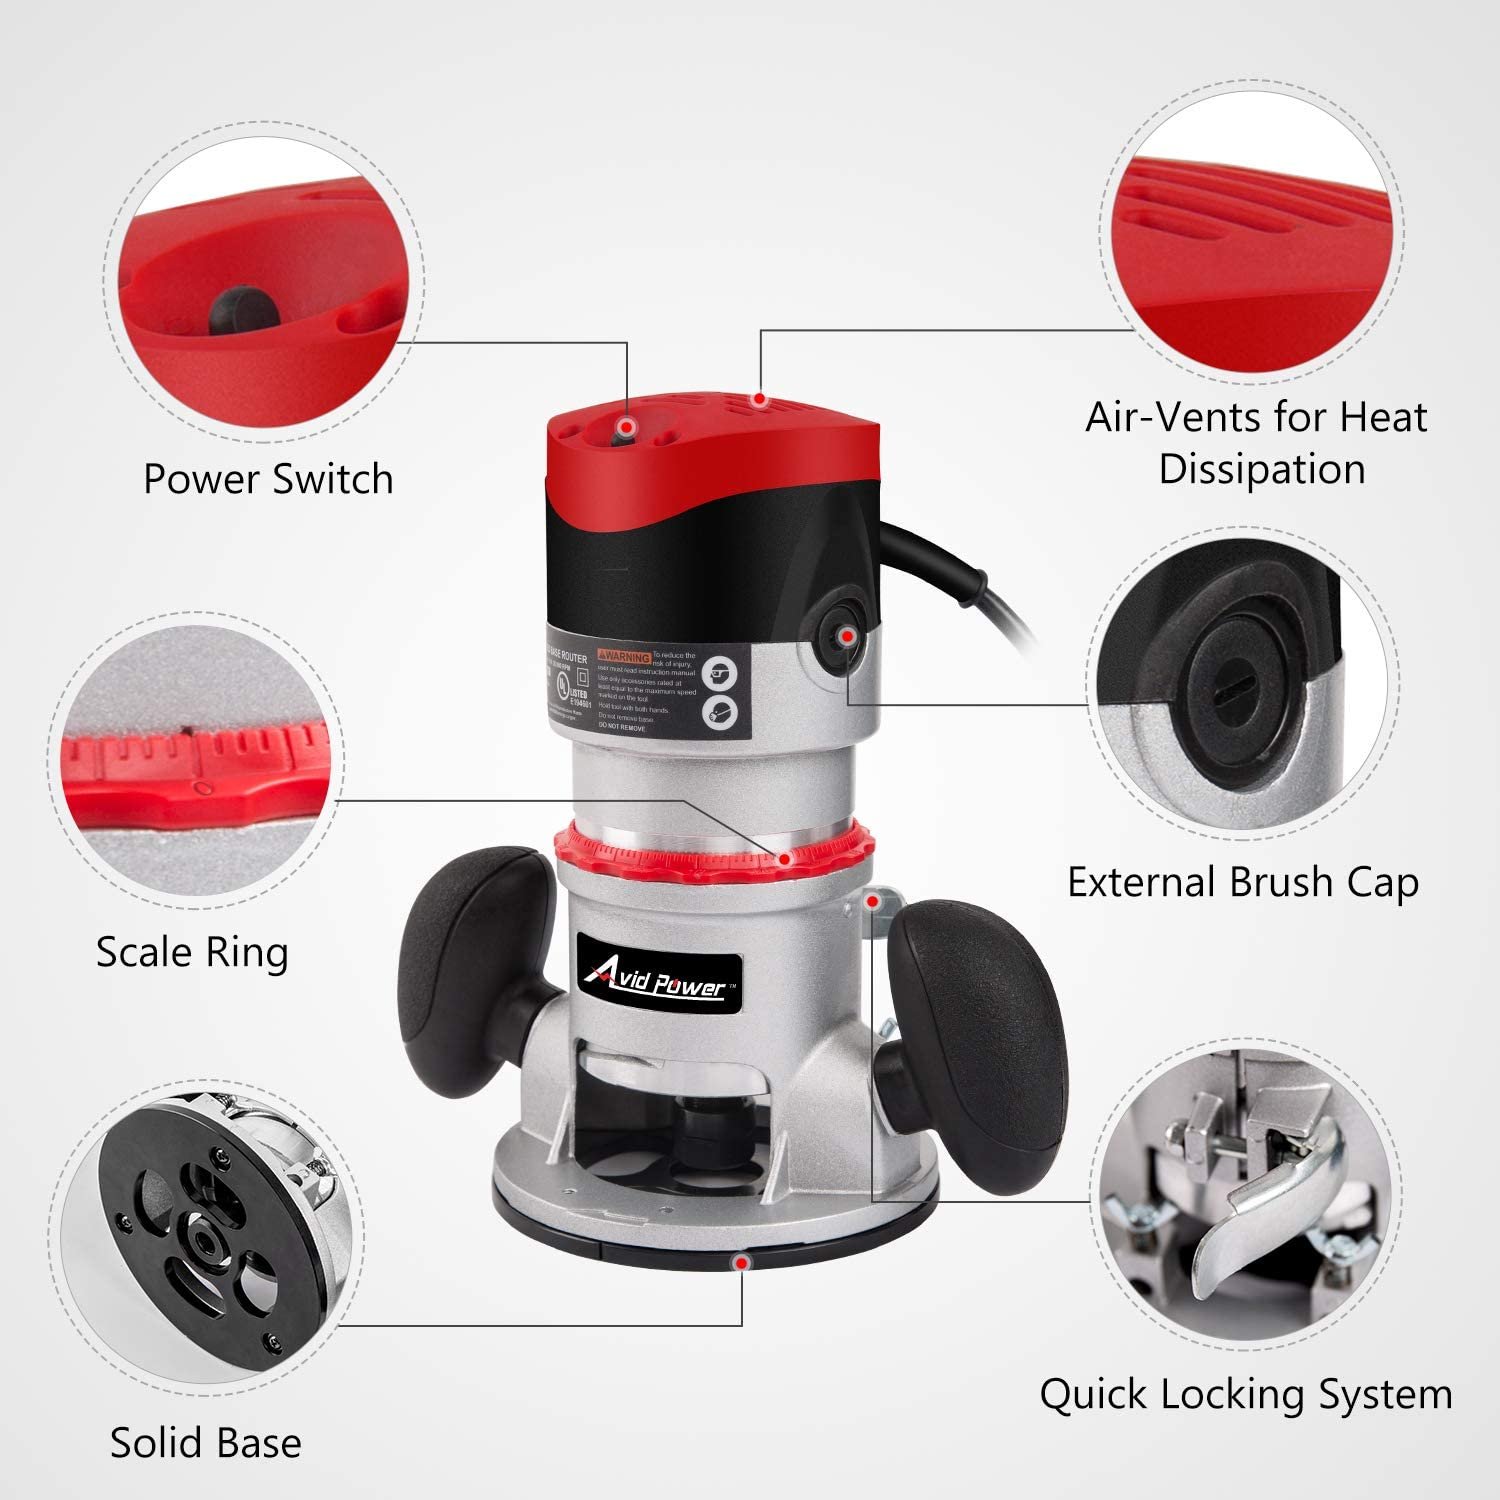
Every setup gets a test cut in the same species and thickness as the real workpiece. Check the depth, the finish and the fit. A two-minute test has saved more projects than any jig. If you want the wider workflow, including how to sequence multiple cuts in one project, this wood router setup guide covers it end to end.
Bottom line
Unplug, seat the bit, set depth from the actual stock, pick a speed that suits the diameter, guide the base, feed against rotation, extract the dust and test on scrap. Eight steps, ten minutes, and the difference between a router that earns its place and one that lives in a drawer.
Build a test cut into every setup
The last step of setup is the one most people skip: cut a piece of scrap from the same species and thickness as the workpiece. Check the depth, the finish and the fit before you touch the good stock. A two minute test cut has saved more projects than any jig, and it is the only way to catch a bit that has crept in the collet or a depth stop that has slipped.
Sub-base and base flatness
The router rides on its base, so a base that is not flat transfers every imperfection into the cut. Check yours with a straightedge, and if you can see light under the middle, fit an acrylic sub-base. Drill it to match the mounting holes, centre it with a chamfer bit, and countersink the screws so they do not scratch the work. This single modification improves every cut you make afterwards.
Depth of cut by bit diameter
A rule that works: never take a pass deeper than the bit diameter on the first cut, and no more than half the diameter on subsequent passes in hardwood. A quarter inch bit therefore takes an eighth of an inch per pass in oak, which sounds slow until you compare it with the time spent sanding out burn marks. Softwood tolerates deeper passes, and plywood tolerates more still, but the edge quality always improves with shallower cuts.
Feed direction and climb cutting
Feed against the rotation of the bit. On an outside edge, with the router upright and the bit spinning clockwise seen from above, that means moving right to left along the edge. Feeding with the rotation is a climb cut, which pulls the router into the work and produces a runaway cut in most hands. Climb cutting has legitimate uses on veneer and in template work, but it is an advanced technique, not a default.
Hold-down and work support
The workpiece must not move. Clamp it to a bench with the edge overhanging so the router base has support on both sides of the bit, or use a router mat for small pieces. Never hold a workpiece with one hand and the router with the other. Support the offcut side as well, because a piece that drops at the end of a cut takes a chunk out of the corner.
Dust, noise and eye protection
Routing generates fine dust and chips in quantity. Connect a shop vac, wear a respirator, and use eye protection because chips leave the bit at speed. Hearing protection is not optional at twenty thousand revolutions per minute, especially in a small shop with hard walls.
Storage and bit care
Store bits in a rack so the cutting edges do not touch. Clean them with a proprietary remover rather than scraping, and have them sharpened when the cut starts to burn rather than when it stops cutting. A dull bit is the most common cause of a router that seems to have lost power.